

Hamstring Help!
Photography by Darren Brown
As a teacher, one of the most common complaints I hear from yogis is a feeling of hamstring “tightness” or high-hamstring pain, with people often assuming they are “short and tight”. However: tight is a feeling, but not necessarily an accurate description of what’s happening in the muscles. Feeling tight can certainly come with a muscle that has been chronically contracted or shortened. Feeling tight and experiencing nagging pain can also come as a result of over-stretching. Your hamstrings are a group of 3 muscles (Biceps Femoris, Semitendinosus, Semimembranosis). They help to extend your hip and flex your knee. Biceps Femoris also internally rotates your leg while the others help to externally rotate. Your hamstrings help you to climb stairs, run, bicycle, donkey kick and do your best running-man dance moves!
With so much focus on forward folds and back chain stretching, much of our yoga practice encourages hamstring lengthening. Here are some ideas for building strength and creating balance in the tissues!
1. To Prepare:


Sit on a chair and place a Yoga Tune Up® Alpha Ball under your hamstring. Start close to behind the knee to target the distal attachments, which are often in a shortened position from so much sitting with the knee flexed.
Roll the ball side to side, applying pressure with the hand on top of the leg if desired.
You can also hold the ball in place and flex and extend the knee.
Then move the ball higher in various incremental steps up the back of the leg and repeat.
The ball will encourage micro-stretch into more targeted areas of the hamstrings than stretching postures alone can achieve. Rolling also increases your proprioception in these tissues, allowing for possibly more efficient contraction once we start working towards more strength!
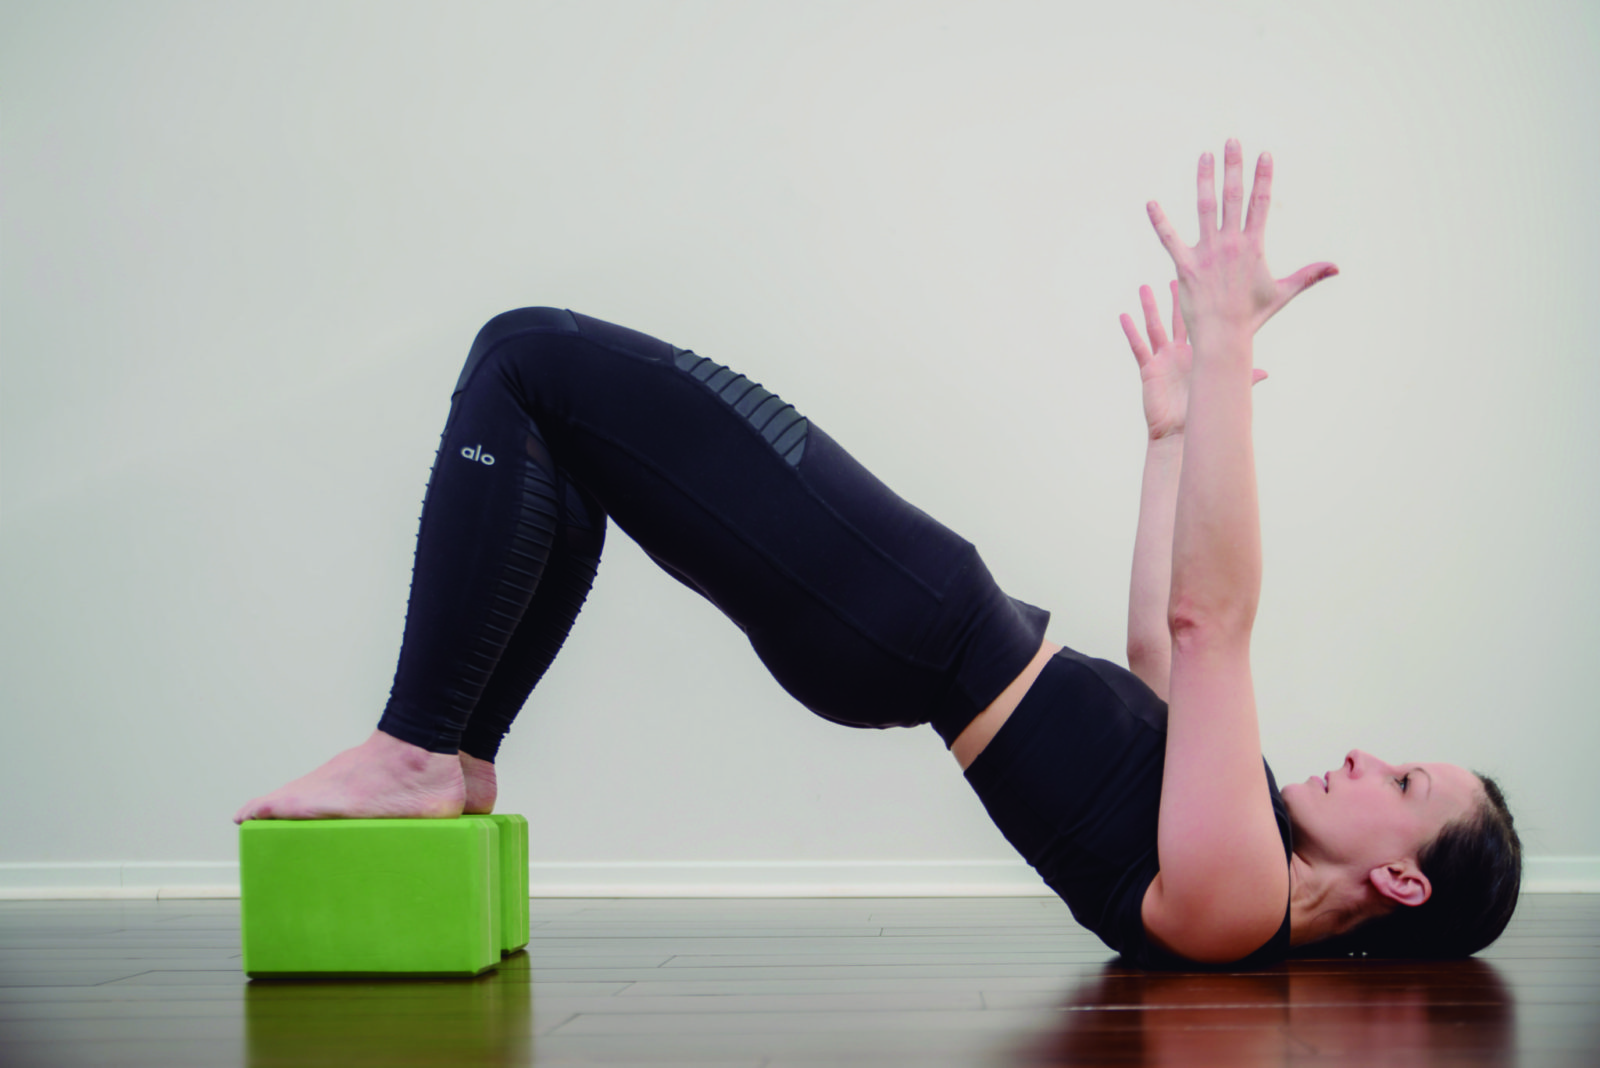
2. Raised Bridge Lifts:

Place blocks under your feet to target more hamstring recruitment than traditional Bridge Lifts (using more quadriceps).
Begin on your back, knees bent and feet on the blocks, with your hips close to the blocks. Tuck the pelvis and press into your feet to lift the hips towards the ceiling, then *slowly lower down. Bonus: Try adding a hold to the raised bridge and engage the glutes.
Next round, try bringing arms up to the ceiling as you raise the hips, moving hips and arms in unison, arriving at the same time at the top and bottom of the pose.
3. Rolling Pin Bridge Lifts:


Set up as through for bridge lifts, but with the feet farther away from the hips, with heels on a roller. Tuck the pelvis and press into your heels to lift the hips towards the ceiling. Then scroll the roller back onto your ball of your foot, while keeping hips raised.
Press back out to your heels and repeat. You can try a few rounds lowering in between sets and then work up to rolling in and out 3-5 times before lowering the hips.
4. Parsvottanasana:

Stand with the feet in parallel and slide the left foot back, all toes pointing forward and the both heels on the floor. Keep the legs positioned as though you are on a cross-country ski track.
Hinge forward at the pelvis and maintain a neutral spine, bringing your hands down to blocks.
You can add contraction to the lengthened hamstrings here by engaging as though you are trying to slide your front ski back, without actually letting the foot move. This creates and isometric contraction as you hold for 3-5 breaths, release and then repeat other side.
5. Assymetrical Parsvottanasana:


This pose builds on the previous version of Parsvottanasana. Set up is the same, with the exception of adding a block under the front foot. Apply all the same directions above and then add flexion of the shoulder by reaching your arm to come parallel to the floor.
Adding the block under your foot helps to approximate the femur into the hip socket and create a deeper hip flexion. Adding the arm recruits your core and back extensors to stabilize your torso against gravity- bonus!
6. Single-leg Dead Lift with weight:


Start standing with a kettle bell or dumb bell in your right hand. Flex the right hip and knee, while maintaining a strong standing leg and glutes strongly engaged. Then bend into the left leg and hinge at the hips, with the right leg coming behind you and right arm reaching forward- as though you are dipping the weight into a pool of water in front of you. You may touch down to the floor, or come half way down to start. Press firmly through the standing leg to come back to a strong Tadasana on one leg, then repeat 5-10 times and switch sides.
7. Single-leg Dead Lift with rotation and balance:


Here we remove the weight and add a block under the standing leg to challenge balance. The sequence begins the same as above, dipping down in a hinge, bringing the raised leg behind you. Once you come back to standing on one leg, extend the right leg out in front of you, and slowly add a spinal rotation towards the lifted leg. Press the standing leg firmly down into the block while feeling an upward spiralling energy of the torso and top of the head. Arms out wide will also help with balance. Slowly de-rotate and start again!